
The following article explains how to integrate Cisco WiFi Networks with Basking.io using location data provided by Cisco Spaces. This integration allows you to use your existing WiFi network with Basking.io to provide occupancy analytics for your offices.
Architecture
The following diagram explains the general architecture of the integration between Cisco and Basking:
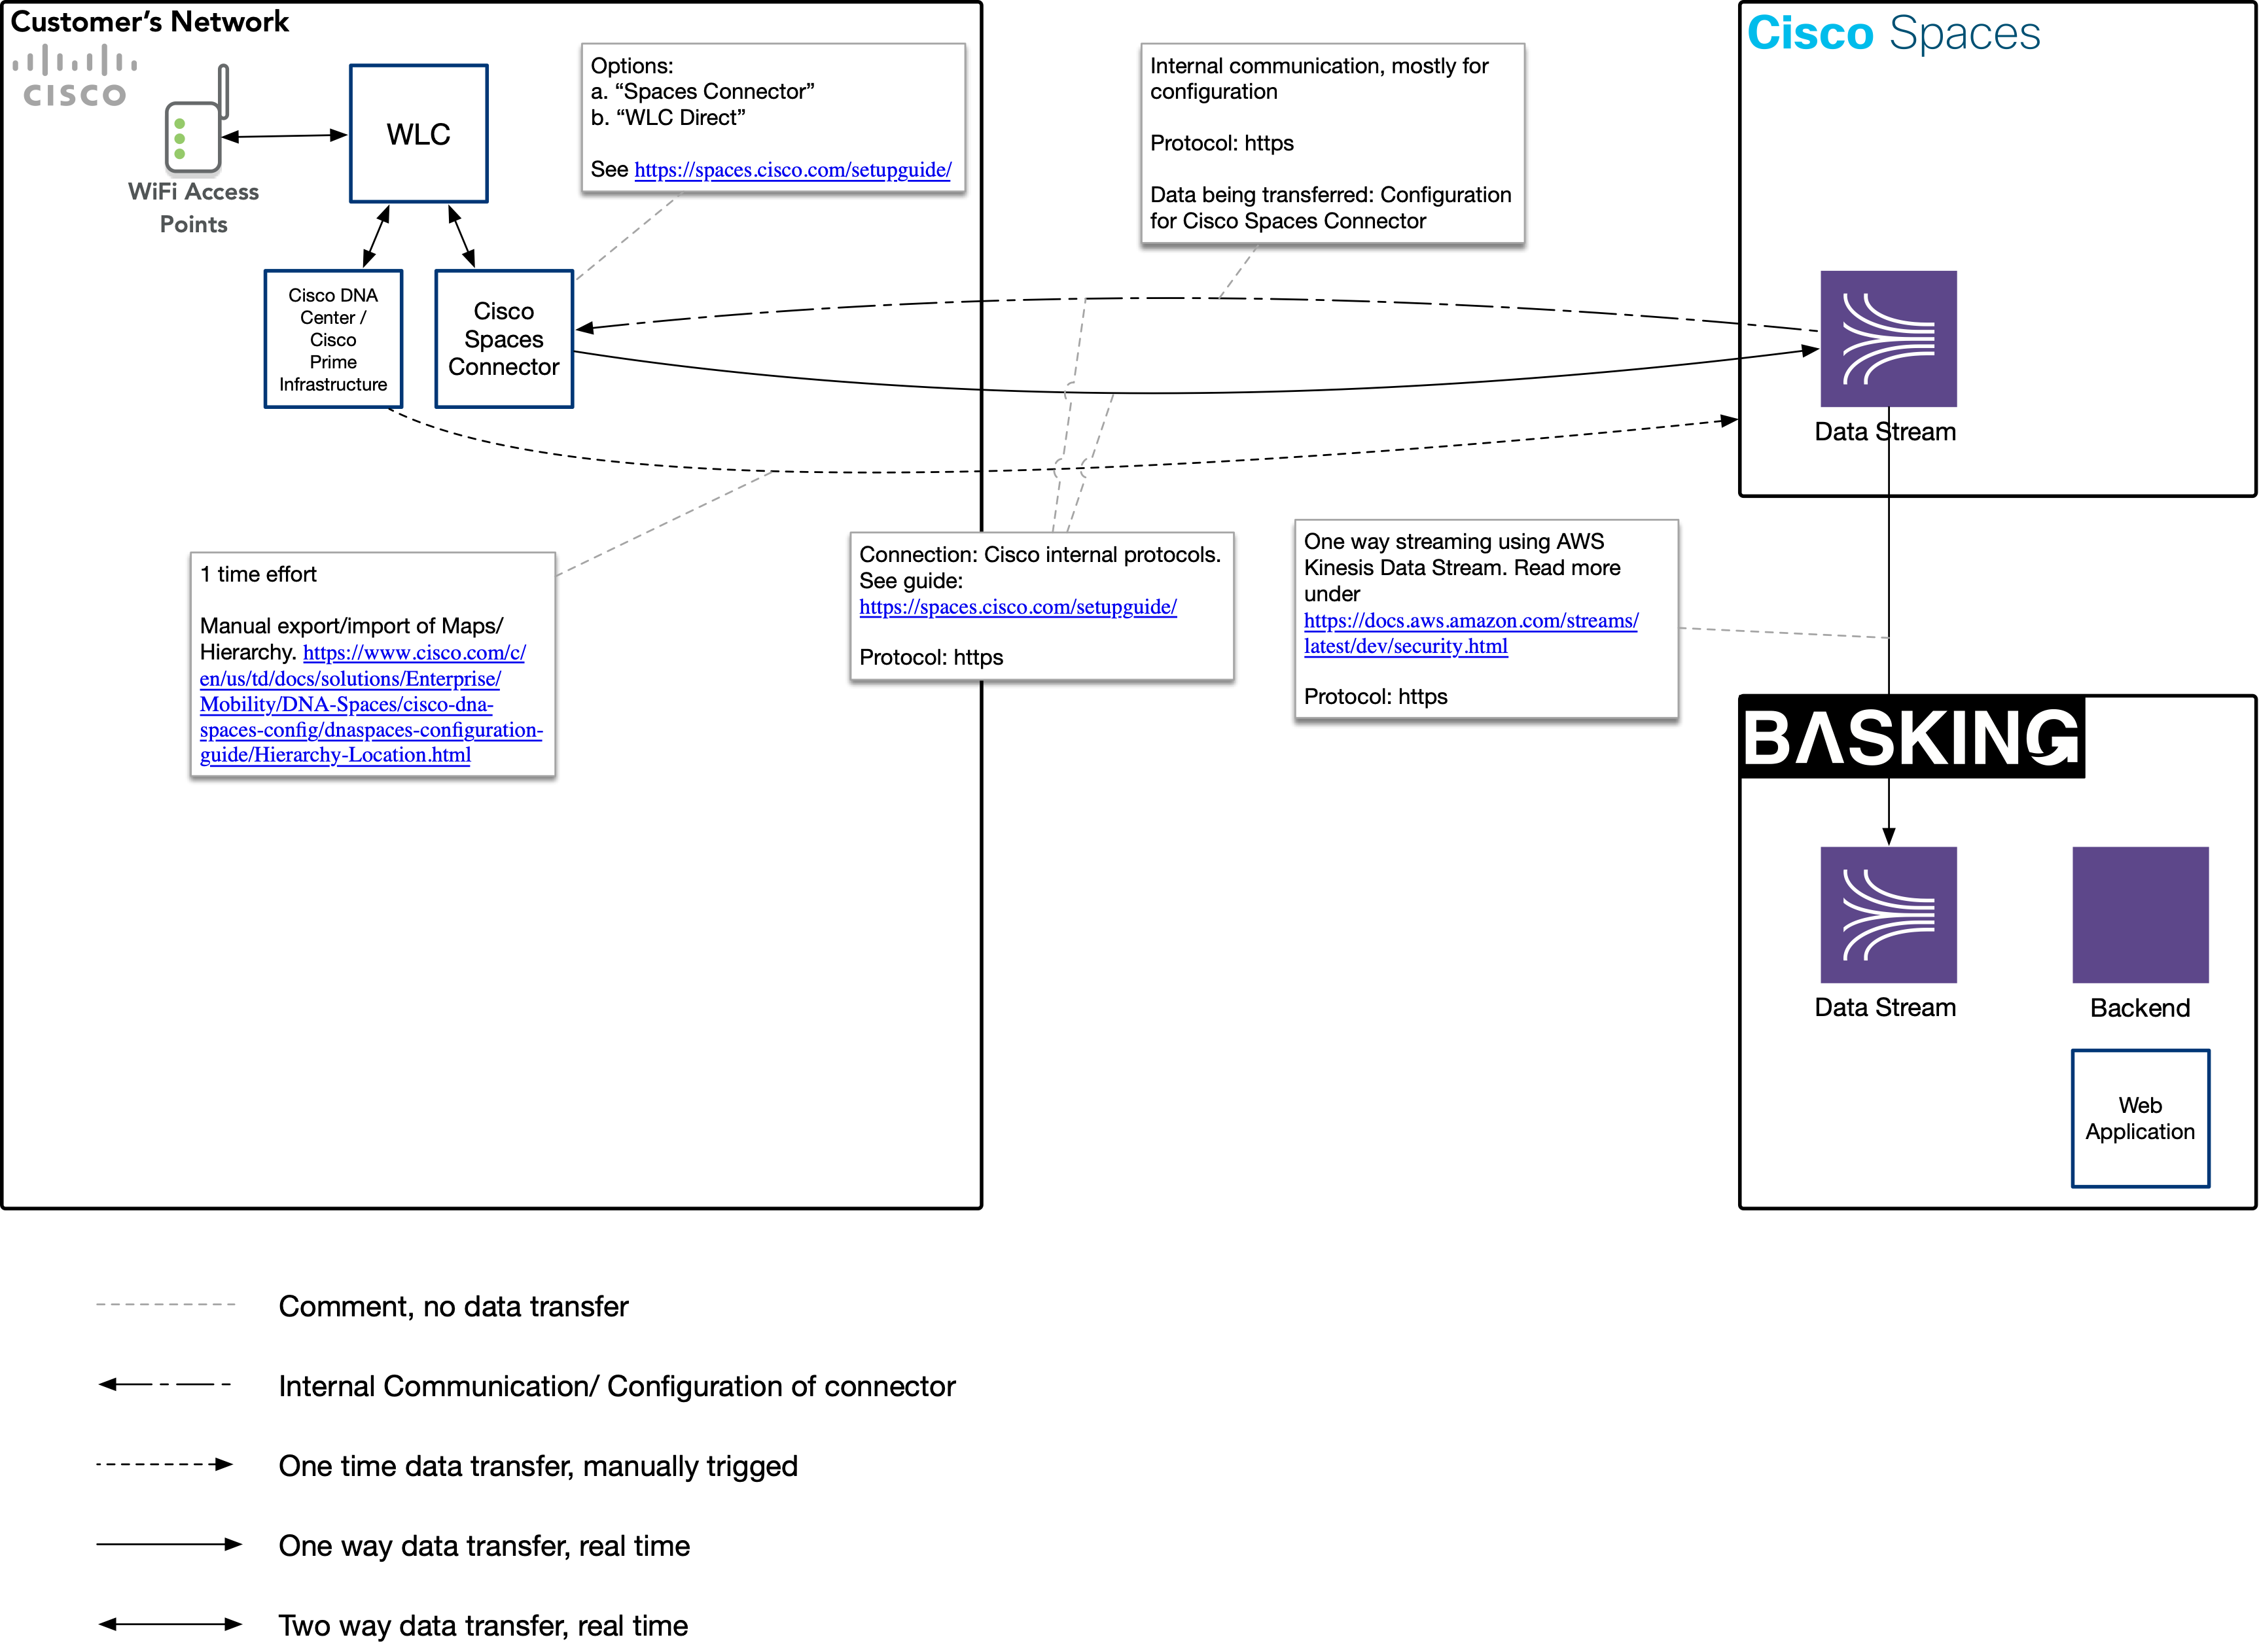
Basking.io Spaces Architecture Overview
You can also download the Basking.io DNA Spaces Architecture overview as a pdf file.
Ownership
At any point, the Cisco Spaces account is owned and maintained by the customer IT team. Basking will not require access to Cisco Spaces.
Requirements for the integration
a) Hardware and software requirements
- Cisco wireless network
- Cisco WLC with software 8.3 or later
- Cisco Spaces Connector
- Cisco Prime Infrastructure or Cisco DNA Center (for the hierarchy)
- Extend Licences for Cisco Spaces
See more details on the Cisco Spaces Configuration Guide.
b) Organizational requirements
- An account on DNA Spaces (US or EU)
- IT-admin access to WLC (IT team member with admin access to the WLC, in order to perform the Spaces integration. Basking does not require access to Spaces or WLC)
- Necessary corporate firewall rules in order to let the Cisco Spaces connector communicate with the Cisco Spaces cloud
- Admin access to Cisco Prime Infrastructure or DNA Center
- Floorplans with measures and position of APs
Steps for integrating Cisco Spaces with Basking.io
There are three basic steps to integrate Basking into Cisco Spaces.
1) Setup Cisco Spaces
In order to set up Cisco Spaces, you need to start by setting up the Cisco Spaces Connector. Technical documentation can be found here.
2) Upload the Floorplans/ Map hierarchy into Cisco Spaces
There are 2 options to upload the floor plans into Cisco Spaces. This step is required, and it enables DNA Spaces to perform the triangulation of WiFi data for the location analytics used by Basking.
a) Using DNA Center (Recommended)
- Configure the maps in DNA Center
- Connect DNA Center to export the maps to DNA Spaces
b) Using Cisco Prime (Legacy)
- Configure the Maps in Cisco Prime
- Export the maps
- Import the maps into Cisco Spaces.
3) Activate Basking.io from the Cisco Spaces partner ecosystem
Basking can be found in the Partners marketplace. It has to be activated for the account, and then the elements on the hierarchy must be selected. After this, DNA Spaces will send the data to Basking.
Please note that Basking can’t access any data in the past, only from the activation date onwards.
Time estimation for installing Cisco Spaces
The following article in our knowledge base explains how long it takes to install Cisco Spaces in your organization.